DIY Roof Vent Cleaning: A Step-by-Step Guide (Save Money!)
Roof ventilation is an essential component of a home’s HVAC system. It helps regulate the temperature and humidity levels inside the house, ensuring a comfortable living environment. However, over time, the vents can become clogged with dirt, debris, and other particles, hindering their efficiency. This can lead to increased energy bills and poor air quality. Therefore, it’s essential to clean your roof vents regularly to keep them in optimal condition.
Hiring a professional to clean your roof vents can be expensive, but you can save money by doing it yourself. DIY roof vent cleaning is a straightforward process that requires minimal equipment and can be done in a few hours. This article provides a step-by-step guide on how to clean your roof vents, from understanding roof ventilation to post-cleaning ventilation checks.
Key Takeaways
- Regular roof vent cleaning is essential for optimal HVAC system efficiency and air quality.
- DIY roof vent cleaning is a simple process that can be done in a few hours and can save you money.
- This article provides a step-by-step guide on how to clean your roof vents, from understanding roof ventilation to post-cleaning ventilation checks.
Understanding Roof Ventilation
Proper roof ventilation is crucial for maintaining a healthy and energy-efficient home. It helps to regulate the temperature and humidity levels inside the attic, preventing the buildup of moisture and heat that can cause damage to the roof and insulation. Additionally, adequate ventilation can reduce energy costs by keeping the attic cooler in the summer and preventing ice dams from forming in the winter.
There are two main types of roof vents: intake vents and exhaust vents. Intake vents are located at the bottom of the roof, usually in the soffit or eave, and allow cool air to enter the attic. Exhaust vents are located at the top of the roof, such as ridge vents or gable vents, and allow hot air to escape.
The amount and placement of roof vents depend on several factors, including the size and shape of the roof, the type of insulation, and the local climate. As a general rule, the total net free area of ventilation should be at least 1/150th of the attic floor area, with half of the vents located at the top of the roof and half at the bottom.
Regular maintenance of roof vents is essential for ensuring optimal performance. Over time, vents can become clogged with debris, such as leaves, dirt, and bird nests, which can impede airflow and reduce ventilation efficiency. Cleaning the vents at least once a year can help to prevent these issues and extend the lifespan of the roof.
Benefits of Regular Vent Cleaning
Regular vent cleaning is an essential part of maintaining a safe and efficient home. Here are some of the benefits of regular vent cleaning:
- Prevents fire hazards: Lint buildup in dryer vents is one of the leading causes of house fires. Regular cleaning of the vent can prevent such hazards.
- Saves money: A clogged vent reduces the efficiency of the dryer, leading to increased energy bills. Regular vent cleaning can help save money on energy bills.
- Extends the life of the dryer: A clogged vent can cause the dryer to work harder, leading to wear and tear on the machine. Regular cleaning of the vent can help extend the life of the dryer.
- Improves air quality: A clogged vent can also lead to poor air quality in the home. Regular cleaning of the vent can help improve the air quality.
- Reduces the risk of carbon monoxide poisoning: Gas dryers can produce carbon monoxide, a dangerous gas that can cause illness or even death. Regular vent cleaning can reduce the risk of carbon monoxide poisoning.
By regularly cleaning the vent, homeowners can ensure that their dryer is running efficiently, safely, and with minimal risk of damage or fire.
Safety Precautions and Equipment
When it comes to cleaning roof vents, safety should be a top priority. Homeowners should take the necessary precautions to avoid accidents and injuries. Here are some essential safety tips to keep in mind:
Safety Precautions
- Wear protective gear such as gloves, goggles, and a mask to protect yourself from dust, debris, and harmful chemicals.
- Use a sturdy ladder that can support your weight and reach the vent safely. Make sure the ladder is placed on a stable surface and secure it to prevent it from slipping.
- Avoid working on the roof during wet or windy weather conditions as they can increase the risk of slipping and falling.
- Turn off the power supply to the ventilation system to prevent electrocution and damage to the equipment.
- Never work alone. Have someone nearby to assist you in case of an emergency.
Equipment
Here are some of the essential tools and equipment needed to clean roof vents:
- A ladder: Choose a sturdy, extension ladder that can reach the roof safely.
- A cleaning solution: Use a mild detergent or a specialized roof cleaning solution to clean the vent. Avoid using harsh chemicals that can damage the vent or harm the environment.
- A bucket: Use a bucket to mix the cleaning solution and carry the necessary equipment to the roof.
- A brush: Use a soft-bristled brush to scrub the vent gently. Avoid using abrasive materials that can damage the vent.
- A hose: Use a garden hose to rinse the vent thoroughly after cleaning it.
Determining Your Roof Vent Type
When it comes to cleaning your roof vents, it’s important to know what type of vents you have. Different types of vents require different cleaning methods, so identifying your vent type is essential.
Box Vents
Box vents, also known as static vents, are a common type of roof vent. They are typically square or rectangular and sit on top of the roof. Box vents work by allowing air to escape from the attic as hot air rises and exits through the vents.
To identify box vents on your roof, look for square or rectangular vents evenly spaced along the roofline. Box vents are typically made of metal or plastic and are easy to spot.
Ridge Vents
Ridge vents are another common type of roof vent. They are installed along the roof’s ridge and allow hot air to escape from the attic. Ridge vents are a popular choice because they are less visible than other types of vents and provide continuous ventilation along the entire roofline.
To identify ridge vents on your roof, look for a continuous vent running along the roof’s ridge. Ridge vents are typically made of metal or shingle-over vents and are more difficult to spot than box vents.
Soffit Vents
Soffit vents are installed under the roof’s overhang and allow cool air to enter the attic. They work in conjunction with other types of vents, such as box or ridge vents, to provide proper ventilation.
To identify soffit vents on your roof, look for small vents located under the eaves of the roof. Soffit vents are typically made of metal or plastic and are easy to spot.
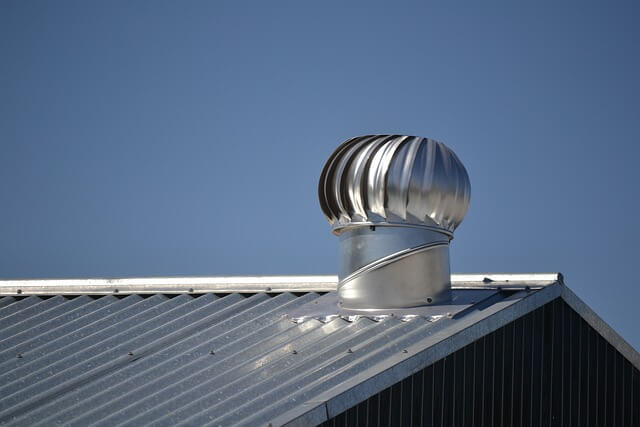
Power Vents
Power vents, also known as attic fans, are a type of roof vent that uses electricity to move air through the attic. They are typically installed on top of the roof and can be controlled by a thermostat or switch.
To identify power vents on your roof, look for a large, dome-shaped vent on the roof’s surface. Power vents are typically made of metal or plastic and are easy to spot.
Knowing your roof vent type is essential when it comes to cleaning your roof vents. By identifying your vent type, you can ensure that you are using the proper cleaning method and tools for your specific vents.
Pre-Cleaning Preparation
Before starting the DIY roof vent cleaning project, it is important to prepare and make sure you have all the necessary tools and equipment. The following steps will help you prepare for the cleaning process:
- Safety First: Always prioritize safety when working on the roof. Wear non-slip shoes and use a sturdy ladder to reach the roof. Work with a partner for extra safety.
- Identify the Type of Roofing Material: Different types of roofing materials require different cleaning methods. It is important to identify the type of roofing material before starting the cleaning process. This will help you choose the right cleaning product and method.
- Check for Damages and Leaks: Before starting the cleaning process, check for any visible damage or leaks on the roof. This will help you avoid causing further damage to the roof during the cleaning process.
- Remove Debris from the Roof: Remove any debris from the roof, such as leaves, branches, and other objects. This will help you access the roof vent easily and avoid any accidents.
- Turn Off the Power: Before cleaning the roof vent, turn off the power to the dryer. This will help you avoid any accidents and ensure your safety.
By following these steps, you can prepare for the DIY roof vent cleaning process and ensure your safety. It is important to prioritize safety and take necessary precautions to avoid accidents and injuries.
Accessing Your Roof
Before starting the cleaning process, it’s essential to ensure that you can safely access your roof. Here are a few things to consider:
Safety First
Cleaning your roof can be dangerous, especially if you’re not used to working at heights. It’s essential to take all necessary precautions to avoid accidents and injuries. Here are some tips to keep in mind:
- Wear slip-resistant shoes or boots with good traction.
- Use a sturdy ladder that’s long enough to reach your roof safely.
- Secure the ladder at the base and the top to prevent it from slipping.
- Use a safety harness and a rope to secure yourself to a stable anchor point.
- Avoid working on your roof during wet or windy weather conditions.
Check Your Roof’s Condition
Before climbing onto your roof, it’s essential to inspect its condition. Look for signs of damage, such as cracks, holes, or missing shingles, that may compromise your safety. If you notice any issues, it’s best to address them before starting the cleaning process.
Gather Your Equipment
Once you’ve assessed your roof’s condition and ensured your safety, it’s time to gather your equipment. Here’s a list of items you may need:
- A sturdy ladder
- A safety harness and rope
- Gloves
- Safety glasses or goggles
- A broom or brush
- A leaf blower or a pressure washer (optional)
- A bucket and a hose
- A cleaning solution (such as a mixture of water and bleach)
By following these steps, you can safely access your roof and prepare for the cleaning process. Remember to take your time and avoid rushing to prevent accidents and injuries.
Inspecting Vents for Damage
Before starting the DIY roof vent cleaning process, it is important to inspect the vents for damage. This will help to identify any potential issues that may require repair or replacement before cleaning.
One way to inspect the vents is to climb up onto the roof and visually inspect each vent. Look for signs of damage such as cracks, holes, or missing pieces. If any damage is found, it may be necessary to replace the vent before cleaning.
Another way to inspect the vents is to use a flashlight to look inside the vent from the attic. This can help to identify any blockages or debris that may be obstructing the airflow. If there is a significant amount of debris, it may be necessary to clean the vent more thoroughly or even hire a professional to do the job.
It is also important to check the vent’s flashing, which is the metal or plastic material that surrounds the vent and seals it to the roof. Look for signs of wear or damage, such as cracks or missing pieces. If the flashing is damaged, it may be necessary to replace it before cleaning the vent.
Overall, inspecting the vents for damage is an important step in the DIY roof vent cleaning process. By identifying any potential issues beforehand, homeowners can ensure that their vents are functioning properly and avoid more costly repairs down the line.
Removing Debris from Vents
When it comes to cleaning vents, the first step is to remove any debris that has accumulated inside them. This is important because debris can block the airflow and reduce the efficiency of the vent. There are two main ways to remove debris from vents: manual cleaning techniques and using cleaning solutions.
Manual Cleaning Techniques
Manual cleaning techniques involve physically removing the debris from the vent. Here are some effective manual cleaning techniques:
- Use a vacuum cleaner: A vacuum cleaner can be used to suck out the debris from the vent. Make sure to use a hose attachment with a narrow nozzle to get into the vent.
- Use a brush: A soft-bristled brush can be used to loosen the debris from the vent. Make sure to use a brush that is appropriate for the material of the vent to avoid causing damage.
- Use compressed air: A can of compressed air can be used to blow out the debris from the vent. This is a quick and easy method, but it may not be effective for larger debris.
Using Cleaning Solutions
Cleaning solutions can be used to dissolve and remove debris from vents. Here are some effective cleaning solutions:
- Vinegar and baking soda: A mixture of vinegar and baking soda can be used to dissolve and remove debris from vents. Mix equal parts of vinegar and baking soda and pour the mixture into the vent. Let it sit for a few minutes and then rinse with water.
- Commercial cleaning solutions: There are many commercial cleaning solutions available that are specifically designed for cleaning vents. Make sure to read the instructions carefully before using them.
It is important to note that some vents may require professional cleaning if the debris is too difficult to remove or if there is damage to the vent. In such cases, it is best to consult a professional to avoid causing further damage.
Cleaning the Interior Ventilation System
Cleaning the interior ventilation system is an essential part of maintaining proper airflow in your home. Over time, dust, dirt, and debris can accumulate in the ducts, reducing the efficiency of your HVAC system and potentially causing health problems. Here are the steps to clean your interior ventilation system:
- Turn off the HVAC system: Before you begin cleaning the interior ventilation system, make sure to turn off the HVAC system to avoid any accidents. Also, ensure that the power switch is turned off.
- Remove the vent covers: To access the interior ventilation system, you need to remove the vent covers. Use a screwdriver to unscrew the covers and keep them aside.
- Wipe down the interior walls: Use a soft-bristled brush to clean the interior walls of the ducts. You can also use a damp cloth to wipe down the walls. Be careful not to damage the walls while cleaning.
- Clean the vent covers: Use a microfiber cloth to clean the vent covers. You can also use a mild dish soap to remove any stubborn dirt or grime. Rinse the covers with water and let them dry completely before reinstalling them.
- Vacuum the ducts: Use a vacuum cleaner with a long hose attachment to clean the ducts. Make sure to reach as far as possible to remove any dust or debris.
- Reinstall the vent covers: Once you have cleaned the interior ventilation system, you can reinstall the vent covers. Use a screwdriver to screw them back in place.
By following these steps, you can clean the interior ventilation system of your home and improve the efficiency of your HVAC system. It is recommended to clean the interior ventilation system at least once a year to maintain proper airflow and prevent health problems.
Addressing Mold and Mildew Issues
Mold and mildew can be a common problem on roofs, especially in humid areas or after a rainy season. Not only are they unsightly, but they can also cause damage to the roof and potentially lead to health issues for those living in the house. Here are some steps to address mold and mildew issues on your roof:
- Identify the affected areas: Check your roof for any visible signs of mold or mildew growth. Look for areas that are discolored, have a musty smell, or feel damp to the touch.
- Choose the right cleaning solution: There are many cleaning solutions available in the market that can help remove mold and mildew from your roof. Chlorine bleach is a popular choice, as it effectively kills mold. You can either buy a premixed solution or make your own by mixing one quart bleach, one gallon water, and 1/4 cup trisodium phosphate in a large container.
- Apply the cleaning solution: Spray the cleaning solution on the affected areas of your roof using a pump sprayer for maximum coverage and ease of application. Start from the lowest row of shingles and work your way backwards to the upper part of the roof. This will prevent the solution from draining in your direction. Continue spraying until you see runoff, then let the chemicals sit for 15-20 minutes to soak in and begin attacking the mold.
- Scrub the affected areas: After the cleaning solution has had time to sit, use a brush with stiff bristles to scrub the affected areas. Be careful not to damage the shingles or other roofing materials. Rinse the area thoroughly with water after scrubbing.
- Prevent future growth: To prevent mold and mildew from growing on your roof in the future, make sure your roof is properly ventilated. This will help to remove excess moisture from the air and prevent it from settling on your roof. Additionally, trim any nearby trees or vegetation that may be blocking sunlight from reaching your roof, as sunlight can help to prevent mold and mildew growth.
By following these steps, you can effectively address mold and mildew issues on your roof and prevent them from returning in the future.
Sealing and Patching Vents
Proper sealing and patching of roof vents are essential to prevent water from entering the attic. Water intrusion can cause costly damages to the interior of the home, including mold and mildew growth. Here are some steps to follow when sealing and patching roof vents:
- Check for any visible cracks or gaps around the vent. These can be sealed with roofing cement or silicone caulk. Apply the sealant generously and smooth it out with a putty knife. Make sure to cover the entire area to ensure a tight seal.
- If the vent itself is damaged or cracked, it may need to be replaced. Remove the old vent and measure the opening to ensure the new vent will fit properly. Install the new vent according to the manufacturer’s instructions, using roofing nails or screws to secure it in place.
- For metal vents, use a metal patch to cover any holes or gaps. Cut the patch to size and apply roofing cement around the edges to seal it in place. For plastic vents, use a plastic patch or epoxy to cover any damage.
- Inspect the surrounding shingles for any signs of damage or wear. Replace any damaged shingles and secure any loose ones with roofing nails or screws.
By following these steps, homeowners can ensure that their roof vents are properly sealed and patched to prevent water intrusion and protect their home from costly damages.
Post-Cleaning Ventilation Check
After cleaning the roof vent, it is essential to check if the ventilation system is working correctly. Here are some steps to follow:
- Check for airflow: Turn on the bathroom fan or the kitchen hood fan and hold a tissue or a piece of toilet paper near the vent. If the tissue moves, it indicates that the air is flowing correctly.
- Check for moisture: After cleaning the roof vent, it is essential to check for any signs of moisture. Look for any water stains on the ceiling or walls near the vent. If there are any signs of moisture, it could indicate that there is a problem with the ventilation system.
- Check for odors: If there are any unpleasant odors coming from the vent, it could indicate that there is a blockage or a problem with the ventilation system. In such a case, it is best to call a professional to inspect the system.
- Check for debris: It is essential to check the vent periodically for any debris or blockages. If there is any debris, it could cause the ventilation system to malfunction.
Remember, proper ventilation is essential for maintaining good air quality and preventing mold growth. Therefore, it is crucial to ensure that the ventilation system is working correctly after cleaning the roof vent.
Maintenance Tips for Long-Term Upkeep
Regular maintenance of roof vents is essential to ensure their longevity and prevent costly repairs or replacements. Here are some tips to help you maintain your roof vents in good working condition:
Inspect your roof vents regularly
Inspect your roof vents at least once a year, preferably in the fall or spring, to ensure they are functioning properly. Look for signs of damage, such as cracks, rust, or missing parts. Check the seals around the vents to ensure they are tight and secure. Any damage or wear and tear should be addressed immediately to prevent further damage.
Clean your roof vents
Cleaning your roof vents regularly will help prevent clogs and blockages that can cause damage to your roof and ventilation system. Use a soft-bristled brush or a low-pressure wash with mild detergent to remove dirt, debris, and any other buildup from the vents. Be careful not to damage the vents or the surrounding roofing materials.
Clear debris from your roof
Debris, such as leaves, branches, and other debris, can accumulate on your roof and around your vents, causing clogs and blockages. Regularly clear debris from your roof and gutters to prevent these issues. Use a broom or soft-bristled brush to gently sweep away debris, taking care not to damage the vents or roofing materials.
Check your attic ventilation
Your attic ventilation plays a crucial role in the performance of your roof vents. Make sure your attic is properly ventilated to allow for adequate airflow. Poor ventilation can cause moisture buildup, which can lead to mold growth, rot, and other issues. If you are unsure about your attic ventilation, consult a professional for advice.
By following these maintenance tips, you can ensure that your roof vents are functioning properly and efficiently, which can save you money on energy bills and prevent costly repairs or replacements in the future.
When to Hire a Professional
While DIY roof vent cleaning can be a cost-effective option, there are certain situations where it is best to hire a professional. Here are some scenarios where it may be wise to call in an expert:
1. When the roof is steep or high
Cleaning roof vents on a steep or high roof can be dangerous for an inexperienced person. A professional will have the necessary equipment and expertise to safely work on a high or steep roof.
2. When there is a large amount of debris or damage
If there is a significant amount of debris or damage to the roof, it may be best to have a professional assess the situation. They can determine if any repairs are necessary and clean the vents safely and effectively.
3. When the homeowner is not comfortable with DIY
Not everyone is comfortable with DIY projects, especially when it comes to working on the roof. In these cases, it is best to hire a professional who can complete the job with ease and ensure the roof vents are properly cleaned.
Overall, while DIY roof vent cleaning can save money, it is important to recognize when it is best to hire a professional. Safety should always be the top priority, and in some cases, it is best to leave the job to the experts.
Frequently Asked Questions
What are the steps for cleaning a dryer vent on the roof?
Cleaning a dryer vent on the roof requires the following steps:
- Turn off the dryer and unplug it from the electrical outlet.
- Remove the dryer vent cover on the roof.
- Use a vent brush or a leaf blower to remove any debris or lint from the vent.
- Clean the vent cover and reattach it to the roof.
Is it possible to clean a roof vent from the ground, and how?
It is not recommended to clean a roof vent from the ground because it is difficult to access the vent properly. Climbing on the roof can be dangerous and may cause damage to the roof or the vent. It is best to hire a professional to clean the roof vent.
How can I safely clean a roof dryer vent from the inside of my home?
To clean a roof dryer vent from inside your home, follow these steps:
- Turn off the dryer and unplug it from the electrical outlet.
- Disconnect the dryer vent hose from the back of the dryer.
- Use a vent brush or a leaf blower to remove any debris or lint from the vent.
- Reconnect the dryer vent hose to the back of the dryer.
What tools are necessary for a DIY dryer vent cleaning?
The tools necessary for a DIY dryer vent cleaning include a vent brush, a leaf blower, a screwdriver, and a vacuum cleaner.
How much does it typically cost to have a roof dryer vent professionally cleaned?
The cost of having a roof dryer vent professionally cleaned can vary depending on the location and the service provider. On average, it can cost between $100 and $150.
Can using a leaf blower effectively clear out a dryer vent, and what are the risks?
Using a leaf blower can effectively clear out a dryer vent, but there are risks involved. The high pressure of the air can dislodge debris and cause it to become airborne, which can be hazardous to breathe in. It is important to wear protective gear, such as a mask and goggles, when using a leaf blower to clean a dryer vent.